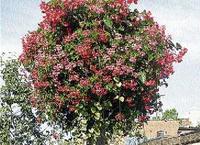

This large hanging basket was pictured in Toronto, Canada, and took my breath away. - Photos by Rita Elliott
Must I remind you that when selecting the plants for your hanging basket, they should all have the same cultivation need regarding light, soil type, amount of watering and fertiliser? If these common needs are not met, things won't work and don't bother.
Another point you have to decide upon: is your hanging basket going to be permanent or temporary? Are you going to create a basket of mixed perennial and annuals. Or a mix of both? Once the annuals have died, you can replace them with different blooms or colours.
When these questions have been answered, then you can prepare your basket as follows:
Six great steps
Step 1: To work with greater ease, rest your basket on the rim of a flat-bottomed bowl, and then detach some chain ends from it.
Step 2: You must line the basket with two inches of damp sphagnum moss and cover it with a piece of plastic with holes for drainage.
Step 3: When the plastic is weighted down with potting mixture, then you can trim its edges so that they will not hang over the rim.
Step 4: First, you want to arrange your trailing plants around the basket rim. You may want to keep them in place with added potting mixture, which you will be carefully firming down.
Step 5: After planting the trailers, put upright plants in the centre of your basket. Then you can add more mixture as necessary.
Step 6: When the basket is filled, tuck in any uncut plastic edges, and replace the chain ends in their original positions.
TIP: If you want to add a small plant such as a cactus, whose cultivations needs are totally different from the other plants, simply insert said cactus in a small pot of its own and give it the appropriate TLC.
What are berms?
Lately, the word 'berm' has been creeping up in countless garden texts. What is a berm? According to garden writers, berms are basically miniature hills in the landscape. They add height to plantings, which can be an effective way to create privacy. A berm is also good for highlighting smaller plants, as it can bring them to eye level.
Because of their sloping sides, berms drain better than flat beds, so they're well suited for rock garden plants and any species that prefer dry soil.
Mound stability
Plant trees and shrubs on berms to form a useful physical and sound curtain between the street and yard. Include rocks and stones to give the mound stability.
To be frank, I checked countless dictionaries that came up with an array of definitions for the word berm, but none that matched closely the above description. I guess this is a new word for the garden glossary, and we shall march on with progress!
Drying herbs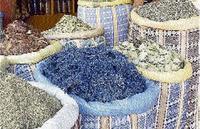
Beautiful bagfuls of dried herbs.
Many herb growers also like to dry some of their crop, whether for use in food later or purely for ornamental purposes
Drying herbs is easy. Most gardeners cut a handful, tie the stems with string, and hang the herbs upside down in a cool, airy place.
Microwave
You can also dry herbs in a microwave. Do small batches and leave them in for only 30 seconds at a time. Take them out, and if they're crumbly when you roll a piece between your thumb and forefinger they're dry. If not, put them back into the microwave for another 15-30 seconds.
You can also lay your herbs out on a screen or paper towel and allow them to air-dry. After drying, store herbs in an airtight container, in a cool, dry place.
TIP: When you harvest herbs, do it in the morning when they're freshest and most aromatic.